

Graduations are coming up and I needed a card for a graduation party that's next month. I was given a really neat graduation card for my high school graduation and this gave me the opportunity to try and recreate it. Thanks to Sally for inspiring me to try and make it and creating the original design!
Supplies:
Graduation Hat Card template
White computer paper
Black poster board
Bone folder
Scissors
Ruler
Glue
Embroidery Floss in school colors
More after the jump....
Directions:
Print out the Graduation Hat Card template from here.

Cut out each square from the template.
Fig. 1
 After each square is cut out, fold each square as directed in the template. To fold the square toward you, first fold the square with the letter on your left in half and press with a bone folder (Fig. 1).
 Fig. 2
 Second, unfold this fold and then fold in half with the letter on the inside using your bone folder (Fig. 2).
Fig. 3-5


Third, unfold this fold and fold one more time on the opposite side again with the letter on the inside of the fold (Fig. 3).
Lastly, unfold this fold and you will now see what appears in Fig. 4. When folded together the letter will be on the inside and the fold will come toward you (Fig. 5).

To fold toward the inside do the same folds in Fig. 1-5 except do the opposite of them. For example, first fold the square in half with the letter on your left but instead of folding it back, make the fold in the front. All squares that need folded toward the inside should look like this:

After each square has been cut out and folded in the correct direction it is now time to glue them together. For this I just used a craft glue stick. Each letter if glued onto the last empty square:


Once you start to glue them together you will get to see what it will look like when the card is open. It becomes an accordion of paper that spells out "Congrats!" but it also folds up really small:


Now it's time to start working on the cap.
First, with your black cardstock cut out two squares that are 3 inches x 3 inches. These will act as the top and the bottom of your cap. Then cut out two rectangles 11 inches x 1 inch:

Put the top and bottom aside. Take one of the rectangles and with your bone folder make a crease every 2.5 inches. You will have a little bit left over. These marks will help you fold it into to make the underside of the hat which your message will be stored in. After you have marked every 2.5 inches, turn the rectangle lengthwise and using your bone folder make a mark the length of the rectangle right down the middle (1/2 inch in on both sides). Then on one side of the rectangle cut up to the middle line on your 2.5 inch marks. This will form the bottom that you will glue to the top of your hat:


Glue both of these to the black squares you cut out earlier - one on each. These will be your top and bottom pieces of the cap and they will fit together to look like this:

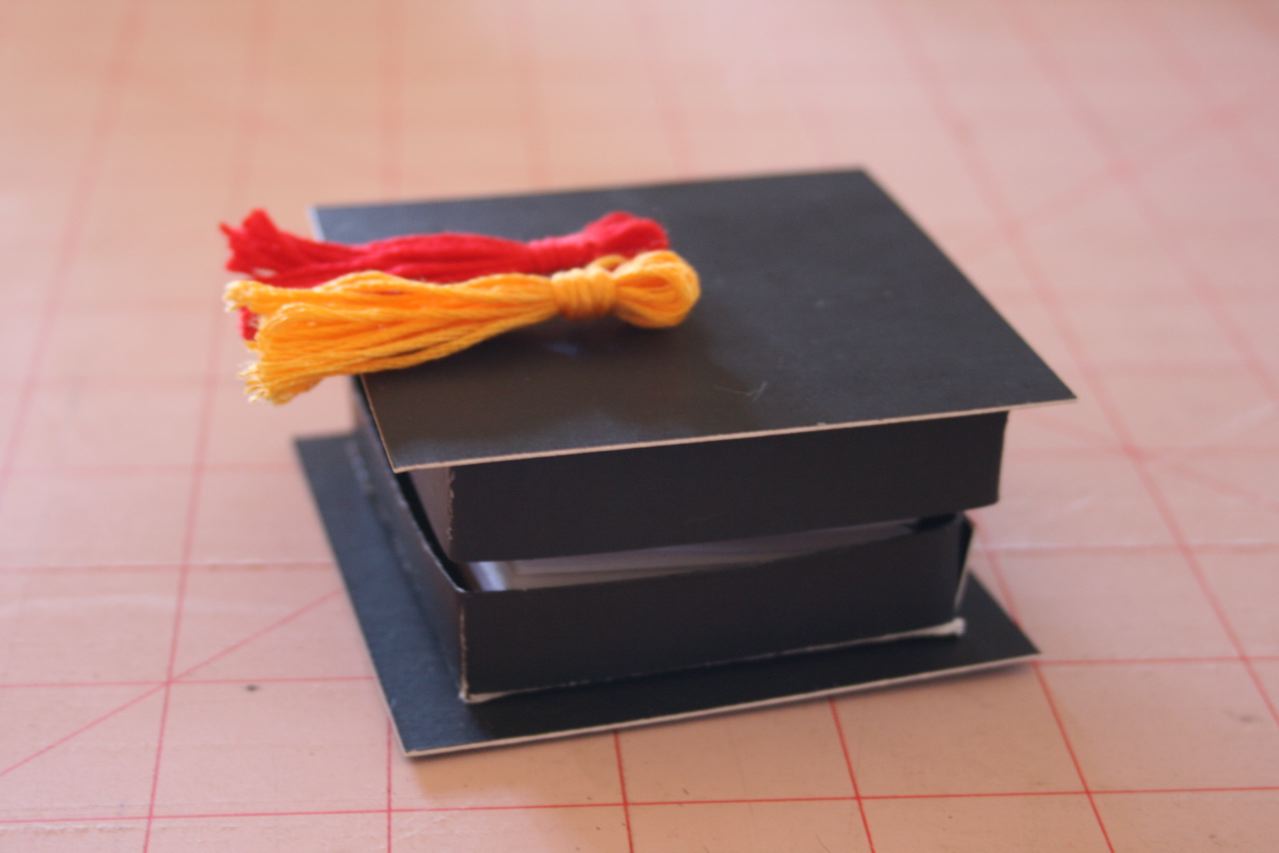
 Next, no graduation cap is complete without tassels. Using floss that is the colors of the graduates school (in my case, red and gold) start making mini tassels to go on top of the cap. I used my first three fingers and this made about the right size. Start by wrapping the floss around your fingers loosely about 10 times.
Cut the end and tie it in between your first and second finger.

Then take it off your fingers and wrap more string around the knotted area and tie off leaving several ends a few inches in length to attach to the cap. Cut your bottom tassel loop. Do this once in each color.
 Next make a small hole in the top of your cap using a knife. Poke your tassel ends through this and pull through the other side. Attach to the other side with glue or tape.
Once your tassels are secure, glue the top of your accordion to the top inside of your cap and the bottom part of your accordion to the bottom inside of your cap. Let dry.
You're done! You now have a neat card that is also a gift too. The nice thing about the box is that you can also put a few 10 dollar bills in there for the lucky grad. Enjoy!
No comments:
Post a Comment