Thursday, November 18, 2010

Before & After: Living room

Before: The living room when we moved in

After: Living room

It took a lot of work but in the living room it paid off.  We took down the bookshelves that the previous owner put up because although we liked them, we wanted a more open feeling and I was worried they would create clutter.  Then we painted the walls Gliddens Smooth Stone, added baseboards, hung artwork and then moved our stuff.  My favorite part are our national park posters that my mom has been getting us for our anniversary's and our coffee table that we made from wood that was on the bench Lewie proposed to me at.

Tuesday, November 16, 2010

Before & After: Walkway and outdoor stairs

The house had really nice stone stairs that went up to the old dog house when we moved in but they were in bad shape.  They needed weeding really bad and at the top of the stone steps it turned into a walkway that was made from 1' x 1' red brick.  The problem was most of the red bricks were crushed and the yard was growing over them.  So, one of my big projects that I've been working on since we moved in was collecting all the stones from around our property, digging up the red brick and continuing the stone up to the now chicken coop.  The stone stairs were all found on the land so were the ones I used to continue it.  Because of this we didn't have enough stone, so I ended up stopping the stone at the coop and continuing to the coop door with red brick.  We cleaned up some solar lights that were also on the property and gave them a new home along the stone walkway.  It is really nice to do improvements like this and use what you have.  The whole project didn't cost a dime.  I couldn't be happier with the way it turned out.  Now, I can walk up to the coop at night and I have some direction with the paths and lights.  I still have a few red bricks left over which I plan to add next to the coop around our future compost bins.  

Before: Walkway when we moved in

 After: New stone walkway

Before: Red brick's leading to chicken coop

After: New red brick path leading to chicken coop door


Monday, November 15, 2010

Before & After: Chicken coop

Before: as it was when we moved in

I think it's finally done!  We successfully transformed an old potting bench and dog shelter into a chicken coop.  I finished up painting it last week and Lewie finished the nesting boxes which still needed a little work.  Here is a picture during construction:

Before: during construction

And here is the after:

After: Chicken coop

And here are the doors during construction:


And the doors after:

After: Door on chicken coop

And lastly, here is a picture of the side before:

Before:  Chicken coop side as it was when we moved in

After: Chicken coop side

The chickens really seem to enjoy their new home.  They are pretty funny animals.  They each have their own personalty and although we haven't gotten any eggs yet, I'm really glad we decided to get chickens.

I have a few more Before & After's I'd like to post this week if I can get my act together.  Keep your eye out for them!

Friday, November 12, 2010

How to: Build a diamond shaped wine rack


With Thanksgiving coming up, we recently stocked up on wine and ended up with no where to put it.  So, I started researching wine racks.  I wanted something small, something that went with the feel of our house and something easy on the wallet.  All the wine racks I found where either too small, made in China, or way over our budget.  This lead me to try and make our own.  I found a great website tutorial on HomeBrew on how to make a diamond shaped rack and I fell in love with it.  It reminds me of an old wine cellar and looks so natural in our house.  It was made by us, it cost us nothing (because we used what we had here) and it holds just the right amount of wine.  Here's how we did it:

Supplies:

14' of 1" x 10" - we used old barn wood that was on the property
Miter saw or hand saw
Chisel
8 screws
Drill, for pre-drilled holes
Screwdriver
Square

Instructions:


We were lucky enough to have old barn wood on the property that was just over 14' in length, but if you don't, you can just use pine or oak or whatever they have at your local lumber yard.  Either way, you'll have to start by cutting four 2' pieces like so:


Next you'll want to pre-drill holes for your screws. I drilled two holes on one end 2" from each side. Then, on the next board drill two holes on top of the board, again 2" from each side. This will allow your boards to fit together using your screws. I used screws we had in the barn already - 1 1/2" drywall screws.  Screwing all your boards together will make the square of your wine rack.


After your square is complete, you'll need to measure the inside diagonals.  They should be about 32".  Ours were a little different because the wood we used was old and parts of it were warped.  Measure yours just to be sure.  When you have your measurements, cut two more pieces out of your remaining wood the size of your diagonals.  Laying your square rack on the floor, slide your diagonal pieces in and using a straightedge or square mark where the boards meet in the middle.  Where the boards meet you'll need to take out the thickness of one board.  Only take out this amount half of the width of each board.  This will create a slot in each board halfway through that will allow your boards to fit together.  You may need a chisel to get the last bit out.


Slide your inside pieces together and then put them in your wooden square and you should now have a diamond shaped wine rack that holds about 45-50 bottles of wine!

Tuesday, November 9, 2010

How to: Make Thanksgiving patch napkins


I was inspired by The Purl Bee to make these quilted patch Thanksgiving napkins.  They will be a nice touch to our organic and farm fresh feast.  I used my Ash Tree Organics napkins and some leftover scraps from a quilt that I made a few years ago. They aren't perfect, but sort of folksy and I'm glad we won't be using paper napkins that we'll just throw away this Thanksgiving.  I'd love to make the table runner that matches it, but I don't know if I'll have time. Maybe the table runner will be next years project!

Supplies:

Napkins (either bought or make your own)
Sissors
Sewing machine (or by hand)
Scrap fabric
Thread
Fusible interfacing


Instructions:

First, I cut the patch pieces out of scrap fabric.  For mine, I made 2 1/2" triangles.  Then I sewed two triangles together to make a square.  Press the seem open on the back like this:


After you have pressed all your seems on your patches, trim off the overhang.  Next, cut squares the same size as your patches out of fusible interfacing.


Aline your patch and interfacing so that the front of the patch and the fusible side of your interfacing face toward each other (see photo above on right).  Sew around your patch now, leaving a small gap on one side.  Turn your patch inside out, making sure to push out the corners.  Your patch should now look like this:


Next, iron your patch onto your napkins as directed on the interfacing packaging.  Let cool.  Then, sew your patch on in whatever quilt pattern you desire.  I just sewed around the patch and then down the center, 'in the ditch'.


Tis' the season for holiday crafts!

Saturday, November 6, 2010

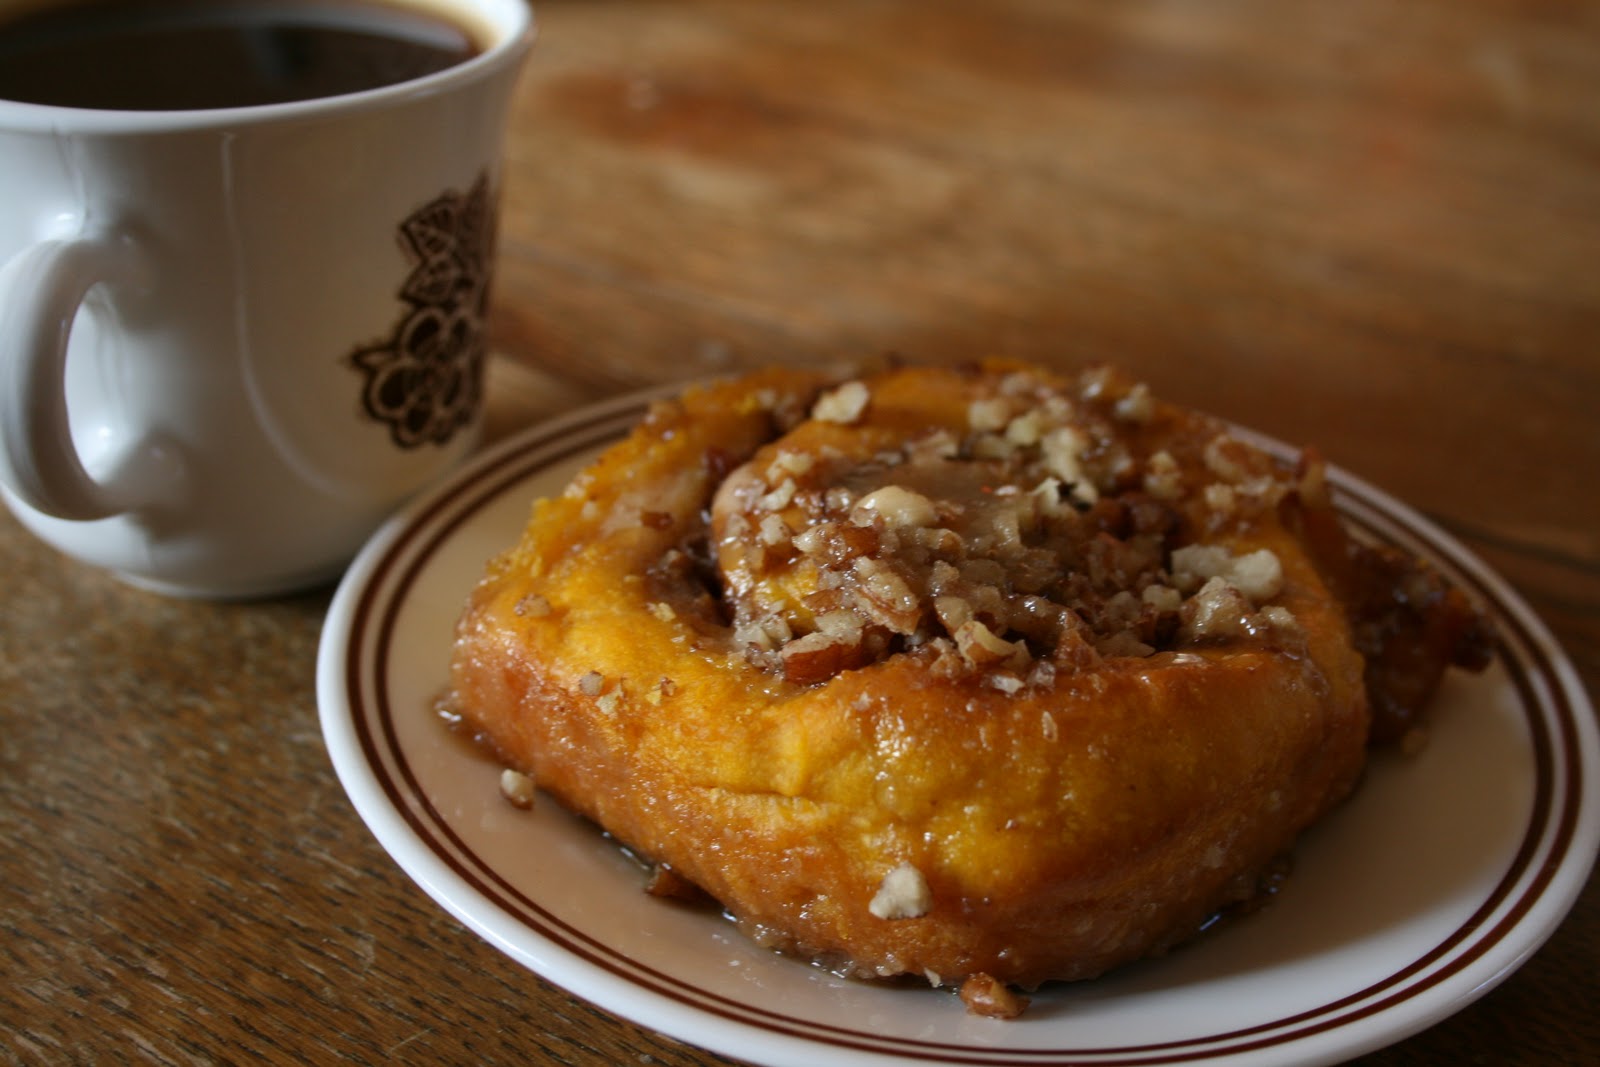
Pumpkin Rolls


You know it's fall when I can make pumpkin rolls instead of cinnamon rolls.  Oh, they are so good.  The smell alone can make your mouth water.  I got the recipe from Apartment Therapy's The Kitchn and I highly recommend it.

No-Knead Pumpkin Rolls with Brown Sugar Glaze from The Kitchn
Makes 16-18 rolls
 
For the dough:
1/4 cup water
1 scant tablespoon yeast (1 package)
1 cup milk
1/2 cup butter
1/2 cup sugar
1 15-ounce can pumpkin puree
1 1/2 teaspoons kosher salt
5 1/2 cups all-purpose flour

For the filling:
1/2 cup butter
1 cup packed brown sugar
2 teaspoons cinnamon
1/2 teaspoon ginger
1/2 teaspoon nutmeg
2 cups pecans - toasted, chopped, and divided in half (optional)
For the glaze:
1/4 cup butter
1/2 cup milk
1 cup brown sugar
pinch salt
2 1/2 cups powdered sugar

Sprinkle the yeast over the water and let it sit a few minutes until the yeast is dissolved.
Meanwhile, warm the milk and butter in a small saucepan on the stove top until the butter is melted. Combine this with the sugar in a large heat-proof mixing bowl and stir until the sugar is completely dissolved.

Let the milk mixture cool until it is just warm to the touch - NOT HOT. Then stir in the yeast and the pumpkin. Add the salt and five cups of the flour all at once, stirring until all the flour has been absorbed. Squish it between your hands if you’re having trouble incorporating the last of the flour. The dough will be sticky, but should come together in a shaggy ball. If it's still more the consistency of cookie batter, work in an additional 1/2 cup of flower.

Cover the dough and let it rise for 1-3 hours. During this time, it should double in bulk. At this point, you can punch the dough down and refrigerate it overnight or continue shaping the rolls.
To shape the rolls (either immediately or with the refrigerated dough), sprinkle your work surface with a little flour and dump the dough on top. Pat it down into a rough rectangle and then use a floured rolling pin to roll it into a rectangular shape about a half an inch thick, longer than it is wide. If the dough gets sticky, sprinkle a little more flour on the dough’s surface and on your hands.

Melt the butter in the microwave and stir in the brown sugar and the spices. Spread this over the rectangle of dough, leaving an inch of bare dough at the top. Sprinkle one cup of the toasted pecans over the dough, if using. Starting at the edge closest to you, roll the dough into a cylinder and pinch it closed at the top.

Rub a tablespoon of soft butter into the bottom of two 9x13 baking dishes, two 9-inch cake pans, or a combination. Using a bench cutter or a sharp knife, cut the cylinder into individual rolls 1 - 1 1/2 inches thick. Place them into your baking dishes so they have a little wiggle room on all sides to rise. Cover them with a clean kitchen towel and let them rise until they fill the pan and look puffy, 30 minutes for already-warm dough and 1 hour for dough that’s been refrigerated.

About 20 minutes before baking, begin heating the oven to 375°. When the rolls are ready, bake them for 20-25 minutes, until the tops are golden and starting to look toasted around the edges. Rotate the pans halfway through cooking.

While they are baking, prepare the glaze. In a small saucepan over medium heat, combine the milk and butter. When the butter has melted, add the brown sugar and salt. Stir until the brown sugar has melted. Remove from heat and strain into a mixing bowl to remove any sugar clumps. Stir in the powdered sugar. This should form a thick but pourable glaze.

Let the baked rolls cool for about five minutes and then pour the glaze on top. Sprinkle the remaining cup of pecans over the top, if more nuttiness is desired. Eat them immediately. Leftovers will keep for several days and are best reheated for a minute in the microwave.

Thursday, November 4, 2010

Red Hot Fire birthday card

We had a birthday to celebrate this week: Lewie's cousin who is turning 9!  So I made him a fire themed card to go with his fire themed gift (a t-shirt and book).  I have yet to unpack all of my card making supplies so I had to make this one entirely from hand.  I have included templates for the card here and here

Supplies:
Cardstock in black, orange, red and yellow
The templates from here and here 
A printer
Craft glue
Ruler

Directions:

Start by downing the templates and blowing up the flame template to the desired size of your card.  You can either print them out as they are and use that, or print them out, cut them out and trace them onto cardstock.  Once you have them on either cardstock or regular paper and they are cut out, glue the red flames onto your orange cardstock.  Cut around the red flames leaving just a small line of orange.  Then glue your yellow flames onto your red and orange flames.  Glue this whole set of flames onto your black cardstock after you cut out the size card you need.  For example, my black cardstock was 8x4 inches, which in turn made my card a 4x4 inch card so my flames were only 4 inches wide.  After you let this dry, print out the other template for the inside of the card.  Cut this so that it will fit inside the card (mine was a little bit less then 4x4 inches.  Glue this on the inside and then you are done!


Sunday, October 31, 2010

Skeleton Brownies


Happy Halloween everyone!  I made these yummy treats for Lewie's office this week via a neat mold from Wilton that was sent in a Halloween package from my mom.  They came out pretty halloweenie.  The mold actually makes two full skeletons that is meant for one brownie so it appears the skeleton is coming 'out of the ground'.  I ran out of eggs though to make my second batch of brownies so I had to make each brownie smaller and therefor each brownie only got a few bones but it was still fun to make them and I'm pretty sure it didn't change the way they tasted.  :)

Friday, October 29, 2010

Tapping maple trees

One of our maples

Twenty-one and six.  We have twenty-one red maples and six sugar maple trees on our property that are over 10 inches in diameter.  We set out to mark them last weekend because we would really like to make maple sugar next year and we wanted to do so before the leaves fall off.  Apparently, you can tap both sugar and red, which is good because we have quiet a few red maples.  The problem however may be that we can't tap here because we are too warm.  Sap in trees is actually a starch but in the winter months when the temperatures are just right the sap turns to sugar and this is when it can be tapped.  The temperatures have to be below freezing at night and above freezing during the day for the sap to flow.  This usually happens in February and March up North and the sap will for for 4-6 weeks.  Knoxville might be too warm though.  So far we can't find anyone around here that taps maples which probably means we can't do it, however I did find some historical references mentioning how maple syrup was important to settles in East Tennessee.  I guess we won't know until we try.

The treehouse in our woods on our walk to mark maples

Tuesday, October 26, 2010

How to: Make a magnetic spice rack

Spices are pretty neat.  They make boring bland dishes, great yummy ones.  Egyptians used to bury their dead with precious spices and cinnamon was once considered as valuable as gold in Rome.  With this is mind, spices don't belong behind a closed pantry door, they belong in the kitchen in plain site ready to use!  At least, this was my excuse for creating my magnetic spice rack.  It's been a few years in the making, slowly collecting the magnetic containers and finding the perfect magnetic board to hold them on, but now it has a permanent place in our new house so I thought I'd share how I did it.  

First, I got the magnetic board at Ikea.  Second, I've been getting the spice containers that are also magnetic at World Market.  They are different from the office ones because they have twist holes on the sides so you don't have to open it to get spices out, you can just shake it, or pour if you use the larger opening.  


Thirdly, I made labels for them using Avery Print Or Write Permanent Filing Labels in size 5202.  The font I used was Claritty which I just think is so pretty.  I have attached a template here.


After printing on the labels, I had to cut them down on the side to fit in the clear top.  I peeled them off and stuck them on after they were the right size.  It is easier to apply them if you pop the clear top out of the lid.   


When the label was on, I popped the clear top back in the lid and filled up my containers.  


And there you go, a nice convenient spice rack in arms reach to the stove.